

To wax a car with a buffer, start by cleaning the car and choosing the right wax. Next, apply the wax in small sections and use the buffer to spread it evenly.How to Wax a Car With a Buffer
Finally, buff the wax off with a clean cloth for a glossy finish. Waxing a car with a buffer is an effective way to protect the paint and give your vehicle a sleek, polished look. It also helps to maintain the car’s exterior by creating a protective layer that repels dirt, water, and UV rays.
Additionally, using a buffer can save time and effort compared to waxing by hand, making it a popular choice for car enthusiasts and professionals alike. Follow these simple steps to achieve professional-quality results and keep your car looking its best.How to Wax a Car With a Buffer

How to Wax a Car With a Buffer
Why Waxing A Car Is Important
Waxing your car with a buffer is not just about achieving a glossy finish, it plays a crucial role in maintaining the overall health and longevity of your vehicle. Let’s explore the reasons why waxing is an essential part of car maintenance.How to Wax a Car With a Buffer
Protects The Paint Job
Wax acts as a protective layer on the car’s surface, shielding it from harmful UV rays, environmental pollutants, and road grime. This barrier prevents oxidation and corrosion, preserving the integrity of the paint job and extending the life of your car’s exterior.How to Wax a Car With a Buffer
Enhances The Overall Appearance
By filling in microscopic imperfections and creating a smooth surface, waxing enhances the overall appearance of your car, giving it a lustrous shine. This boosts curb appeal and makes your vehicle stand out, impressing onlookers and enhancing your pride of ownership.How to Wax a Car With a Buffer
In conclusion, waxing your car with a buffer is not just about aesthetics; it’s a crucial step in protecting the investment you’ve made in your vehicle. By understanding the importance of waxing, you can ensure that your car maintains its beauty and value for years to come.

How to Wax a Car With a Buffer
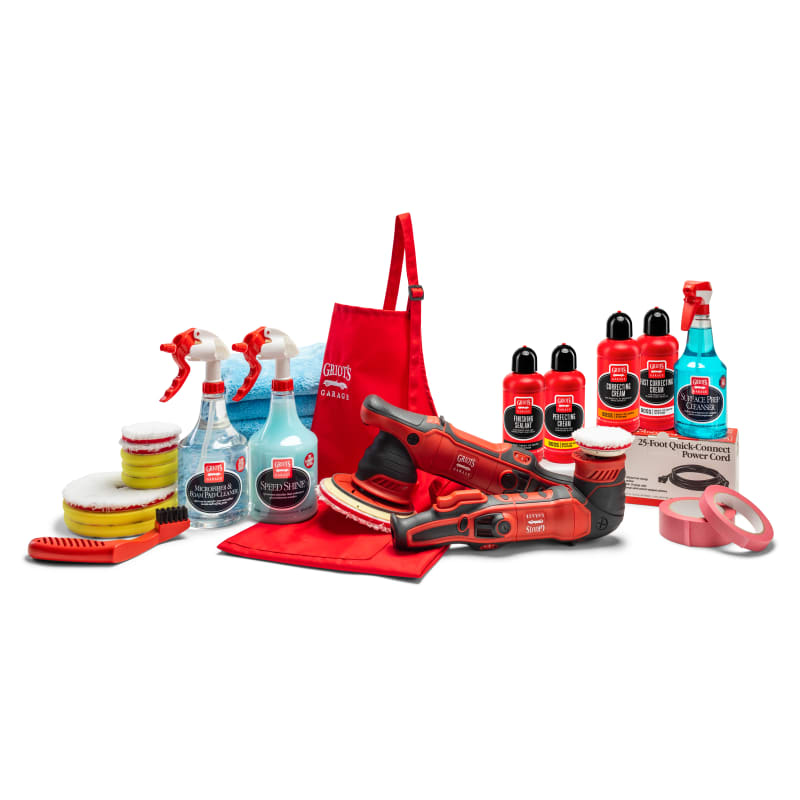
Choosing The Right Buffer
Choosing the right buffer is crucial when waxing your car to ensure a smooth and effective process. Here are the key factors to consider when selecting the ideal buffer for waxing.
Consider The Type Of Buffer
When choosing a buffer, it’s essential to decide between a random orbital buffer and a rotary buffer. Random orbital buffers are suitable for beginners as they minimize the risk of damaging the paint. On the other hand, rotary buffers provide more power and are preferred by experienced users. Consider your level of expertise and the specific needs of your vehicle when making this choice.
Evaluate The Speed Settings
When selecting a buffer, pay close attention to the speed settings. Opt for a buffer with variable speed controls, allowing you to adjust the speed based on the task at hand. Lower speeds are suitable for applying wax, while higher speeds are ideal for removing imperfections. This versatility ensures that you can achieve the best results without causing any damage to your car’s paint.
Prepping The Car For Waxing
Before you can start waxing your car with a buffer, it’s crucial to properly prepare the surface. This preparation involves washing and drying the car, as well as removing any existing wax or sealant. By following these simple steps, you can ensure a flawless finish and long-lasting protection for your vehicle.
Wash And Dry The Car
Begin by giving your car a thorough wash using a gentle automotive soap and a sponge or microfiber cloth. This will help remove any dirt, dust, or grime that can interfere with the waxing process. Make sure to pay extra attention to areas like the wheel wells, door jambs, and any other crevices where dirt can hide.
After washing, rinse off any soap residue using a hose or pressure washer, and then dry the car completely. Drying is critical to prevent water spots and ensure proper adhesion of the wax. You can use a microfiber drying towel or a squeegee to remove excess water effectively. Remember to also dry the windows, mirrors, and wheels.
Remove Any Existing Wax Or Sealant
Before applying a new coat of wax, it’s essential to remove any old wax or sealant that may be on the car’s surface. This step ensures proper bonding of the new wax and allows it to provide maximum protection. There are several ways to remove old wax:
- Clay Bar: Using a clay bar can help remove stubborn dirt and wax residue. Simply spray a lubricant on the surface and glide the clay bar over the paintwork.
- Pre-wax Cleaner: Apply a pre-wax cleaner using a foam applicator pad. This will help dissolve any remaining wax or sealant, making it easier to remove.
- Polishing Compound: For deeper wax or sealant removal, a polishing compound can be used. Apply a small amount of the compound to a foam polishing pad and work it into the paint until the residue is gone.
Once you have removed the old wax or sealant, give the car a final wipe-down using a clean microfiber cloth or towel. This will ensure that the surface is completely clean and ready for waxing.
Selecting The Right Wax
When it comes to waxing your car with a buffer, selecting the right wax is crucial. The wax you choose will determine the shine and protection your car receives, so making an informed decision is important. Consider the type of paint and decide between natural and synthetic wax.
Consider The Type Of Paint
Before selecting the wax, it’s essential to consider the type of paint your car has. Is it a solid color or a metallic finish? This information will help you choose a wax that complements your car’s paint, enhancing its appearance. Additionally, different waxes work better on certain types of paint, so keep this in mind when making your decision.
Choose Between Natural And Synthetic Wax
Once you’ve determined the type of paint, you’ll need to decide if you want to use natural or synthetic wax. Both options have their advantages, so it ultimately depends on your personal preference.
Natural wax, often derived from carnauba palm trees, provides a warm and deep shine to your car’s finish. It’s highly regarded for its water-repellent properties and ability to withstand harsh conditions such as UV rays. However, natural wax tends to wear off faster, requiring more frequent applications.
Synthetic wax, on the other hand, offers a longer-lasting protective barrier. It’s formulated with polymers that bond with the paint, providing a high level of durability against environmental aggressors. Synthetic wax is also easier to apply and remove compared to natural wax. However, it may lack the same depth of shine that natural wax delivers.
To summarize, when selecting the right wax for your car, consider the type of paint and choose between natural or synthetic wax. Natural wax offers a deep shine but requires more frequent applications, while synthetic wax is more durable but may lack the same level of shine. Ultimately, the choice comes down to personal preference and the level of maintenance you’re willing to invest to keep your car looking its best.
Applying Wax With A Buffer
One of the best ways to achieve a stunning shine and protect your car’s paint is by applying wax with a buffer. Using a buffer can make the waxing process more efficient and give your car a professional-looking finish. In this article, we will guide you through the steps on how to properly apply wax with a buffer and achieve excellent results.How to Wax a Car With a Buffer
Apply A Small Amount Of Wax
Before you start applying the wax, it’s crucial to use a high-quality car wax that suits your vehicle. Additionally, ensure that your buffer is equipped with a foam or microfiber pad suitable for waxing. To begin, start by taking a small amount of wax and applying it directly onto the pad. Remember, a little goes a long way, so avoid using too much wax to prevent any excess buildup or wasted product.How to Wax a Car With a Buffer
Spread The Wax Evenly
Once you’ve applied the wax to the pad, it’s time to spread it evenly across the car’s surface. To do this, place the buffer on the surface and turn it on at a low speed to avoid splattering wax onto surrounding areas. Using moderate pressure, move the buffer in straight lines or circular motions, depending on your preference. This technique will ensure that the wax is spread evenly, allowing for maximum coverage and protection.How to Wax a Car With a Buffer
If you notice any areas that need extra attention, you can go over them with the buffer again, applying gentle pressure and ensuring complete coverage.How to Wax a Car With a Buffer
As you work your way over the car’s surface, regularly check the pad to ensure it remains adequately saturated with wax. If necessary, apply more wax to the pad to maintain even coverage.How to Wax a Car With a Buffer
Once you’ve covered the entire vehicle, allow the wax to dry according to the manufacturer’s instructions. Drying time may vary depending on the type of wax, ambient temperature, and humidity levels.How to Wax a Car With a Buffer
When the wax has completely dried, use a clean, soft microfiber cloth to buff off the excess wax, revealing a beautiful, glossy finish.
Remember, always follow the specific guidelines of both the wax and buffer manufacturers for the best results. Now that you know how to apply wax with a buffer, you can easily achieve a professional-looking shine and long-lasting protection for your car’s paint.How to Wax a Car With a Buffer
Buffing The Car To Perfection
To achieve a flawless car wax application, using a buffer is key. The process involves applying wax onto the car’s surface and using the buffer to even it out, resulting in a polished and smooth finish. It’s a simple and effective way to give your car a professional-quality shine.
Now that you have prepared your car and selected the appropriate waxing product, it’s time to give your car that flawless shine by buffing it to perfection. The key to achieving a professional finish is to pay attention to detail and follow the right technique. Here’s how you can achieve the best results by using a buffer:
Choose The Appropriate Speed
Before you begin buffing, it’s crucial to choose the appropriate speed setting on your buffer. The speed setting of the buffer can make a significant difference in the outcome of your waxing job. It’s generally recommended to start with a lower speed setting and gradually increase it if needed. This allows you to have better control over the machine and reduces the risk of damaging your car’s paint surface. Be sure to refer to the instruction manual of your specific buffer model to determine the suitable speed for your car’s paint finish.
Buff In Overlapping Motions
When buffing your car, it’s important to work in overlapping motions to ensure even coverage and a consistent shine. Start by dividing your car’s surfaces into smaller sections, such as the hood, roof, and side panels. Apply a small amount of wax to the buffer pad and spread it evenly over the section you are working on. Then, hold the buffer firmly and move it in slow, overlapping motions across the surface. This will help distribute the wax evenly and prevent any streaks or missed areas.
- Divide your car’s surfaces into smaller sections
- Apply a small amount of wax to the buffer pad
- Spread the wax evenly over the section
- Hold the buffer firmly and move it in slow, overlapping motions
Remember to keep the buffer flat against the surface and avoid applying excessive pressure, as this can cause swirl marks or paint damage. If there are any stubborn stains or blemishes, consider using a specialized cleaner or polish before proceeding with the waxing process. Once you have buffed a section to perfection, move on to the next and repeat the same overlapping motions until your entire car is glistening with a brilliant shine.
By choosing the appropriate speed and buffing in overlapping motions, you can achieve that showroom-worthy finish that will make your car stand out on the road. Take your time, be patient, and enjoy the process of transforming your car into a shining beauty!
Finishing Touches And Maintenance
When it comes to achieving a flawless finish on your car, the finishing touches and regular maintenance play a critical role. After applying wax with a buffer, it’s crucial to remove any excess residue and establish a routine for maintaining the shine. Let’s delve into these key steps for the perfect finish and ongoing care.How to Wax a Car With a Buffer
Remove Excess Wax Residue
To ensure a smooth and even shine, remove any excess wax residue left behind by the buffer. This can be achieved by gently wiping the surface with a clean microfiber cloth, using circular motions. Pay close attention to areas where the wax may have accumulated, such as along panel edges and near trim. Taking the time to eliminate any leftover residue will enhance the overall appearance of the car.How to Wax a Car With a Buffer
Maintain The Shine With Regular Washes
After waxing your car with a buffer, it’s important to maintain the shine through regular washes. Implement a weekly or bi-weekly cleaning routine to keep the exterior in prime condition. Use a pH-balanced car wash soap and a microfiber wash mitt to carefully cleanse the surface, avoiding abrasive materials that could compromise the wax layer. By staying consistent with your car-washing regimen, you can preserve the luster and protect the paint from environmental contaminants.How to Wax a Car With a Buffer
How to Wax a Car With a Buffer How to Wax a Car With a Buffer How to Wax a Car With a Buffer
Frequently Asked Questions Of How To Wax A Car With A Buffer
How Often Should I Wax My Car With A Buffer?
It is recommended to wax your car with a buffer every 2 to 3 months. Regular waxing not only enhances the shine, but also provides a protective layer against contaminants and UV rays, extending the paint’s longevity.How to Wax a Car With a Buffer
Can I Use Any Type Of Wax With A Buffer?
Yes, you can use any type of car wax with a buffer. However, for best results, it is recommended to choose a high-quality carnauba wax or a synthetic polymer wax. These waxes are easy to apply, provide long-lasting protection, and give a deep, glossy finish.How to Wax a Car With a Buffer
Do I Need To Wash My Car Before Waxing It With A Buffer?
Yes, it is crucial to wash your car thoroughly before waxing it with a buffer. Cleaning removes dirt, grime, and other contaminants that could hinder the wax’s effectiveness. Use a gentle car wash soap, microfiber cloth, and clean water to ensure a clean surface for wax application.How to Wax a Car With a Buffer
Conclusion
To achieve a professional-looking finish and protect your car’s paint, waxing with a buffer is an effective method. By following the steps outlined in this post, you can ensure a smooth and glossy surface, eliminating the need for costly visits to the auto shop.How to Wax a Car With a Buffer
Remember to choose the right type of wax for your car’s specific needs and use the buffer properly to avoid any damage. Regular waxing with a buffer will undoubtedly leave your car looking sleek and protected for years to come.