
Keeping your engine healthy is one of the most important parts of car maintenance. And guess what? Changing your engine oil is the easiest place to start! You don’t need to be a mechanic, and you don’t need fancy tools. Just follow a few oil change steps and you will save money, protect your engine, oil change steps, and keep your vehicle running smoothly.
In this complete guide, we will explain what you need, why oil changes matter, step-by-step instructions, how often to change oil, and common mistakes to avoid. Whether you are in the USA or anywhere else, oil change steps, this beginner-friendly tutorial is perfect for you.
What Is an Oil Change and Why Is It So Important?
Engine oil lubricates your engine’s moving parts. Over time, oil breaks down and gets dirty. When that happens:
- The engine works harder
- Fuel economy goes down
- oil change steps
- Engine parts can wear or overheat
- Repairs can become very expensive
Regular oil changes help your engine:
Last longer
Stay clean
Stay cool
Perform better
That’s why every car owner must learn these oil change steps.
What You Need for an Oil Change
Before starting, gather these basic tools and items:oil change steps
| Item | Why Needed |
|---|---|
| New engine oil (right grade like 5W-30) | Fresh lubrication |
| New oil filter | Prevent dirt going back into engine |
| Wrench or socket | To remove drain plug |
| Oil drain pan | To collect old oil |
| Funnel | No mess refill |
| Car jack + stands (or ramps) | For ground clearance |
| Gloves & paper towels | Stay clean and safe |
Tip: Always check your Owner’s Manual to confirm the correct oil type and capacity.
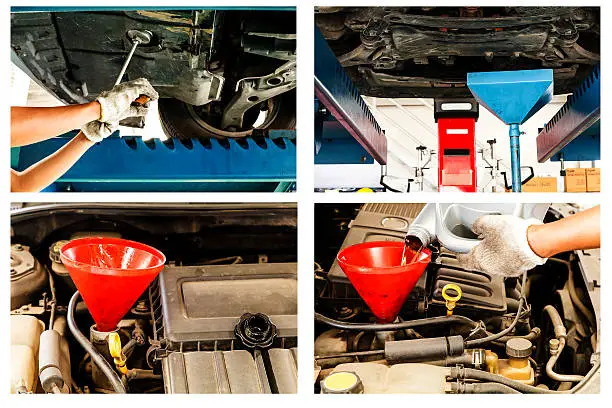
Oil Change Steps (Easy DIY Guide)
Here are the exact oil change steps to follow at home:
Step 1: Park the Car Safely & Warm the Engine
- Park on a flat surface
- Put the car in park & apply parking brake
- Let the engine run 3–5 minutes — warm oil flows out more easily
Step 2: Lift the Vehicle
- Use a jack to raise the front of the vehicle
- Place jack stands or ramps for safety
Never rely only on a jack!
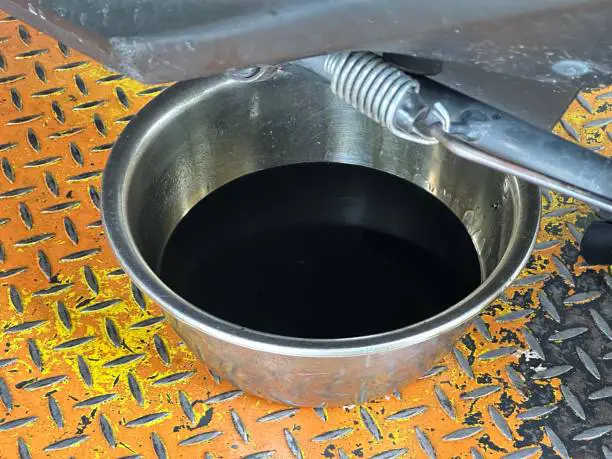
Step 3: Place the Drain Pan Under the Engine
Find the engine oil drain plug underneath (not the transmission plug). Position your drain pan directly below it.
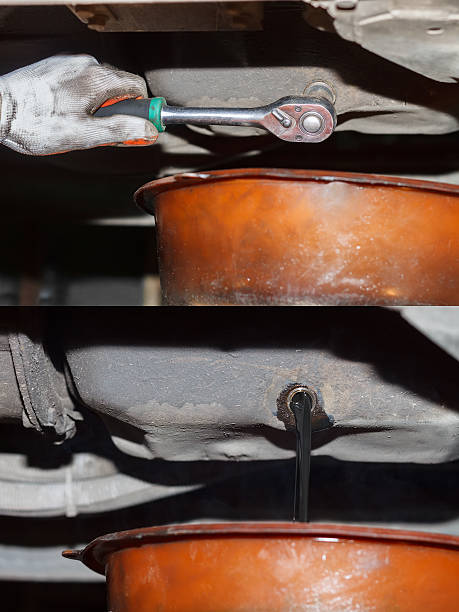
Step 4: Remove the Drain Plug
- Use the correct wrench
- Slowly loosen the plug
Oil will start flowing immediately - Let it drain completely (5–10 minutes)
Oil may be hot — be careful!
Step 5: Remove the Old Oil Filter
Locate the oil filter (usually on the side or bottom of the engine)
Twist it counter-clockwise
More oil will drain — keep the pan under it
Wipe the mounting surface clean with a rag.
Step 6: Install the New Oil Filter
- Make sure gasket is attached to the new filter
- Apply a small amount of fresh oil to the rubber seal
- Screw the new filter on hand-tight only
(Do not over-tighten!)
Step 7: Replace the Drain Plug
Once the oil stops dripping:
- Reinstall the plug
- Tighten securely, oil change steps, but not too hard — you don’t want to strip threads
Step 8: Add Fresh Engine Oil
- Open the hood
- Remove oil cap
- Insert funnel and pour new oil slowly
(Check your manual for the exact amount)
Step 9: Check Oil Level
- Remove dipstick, wipe it, insert again, then check level
Oil should be between MIN and MAX marks
If needed, add a little more.
Step 10: Start the Engine
- Let it run a minute
- Check for leaks under the car
- Turn off the engine and check level again
Perfect! You just completed your oil change steps successfully!
How Often Should You Change Oil?
It depends on your oil type:
| Oil Type | Change Interval |
|---|---|
| Conventional | Every 3,000–5,000 miles |
| Synthetic blend | Every 5,000–7,500 miles |
| Full synthetic | Every 7,500–10,000 miles |
Also change sooner if you:
- Tow heavy loads
- Drive short trips often
- Drive in dusty or hot conditions
- Notice burning oil smell or dark thick oil
Extra Smart Tips for Better Oil Changes
- Always replace oil filter when changing oil
- Use high-quality synthetic oil for longer engine life
- Recycle your old oil at auto parts stores (never pour it outside)
- Record your mileage and date for next change
Common Oil Change Mistakes to Avoid
| Mistake | Problem Caused |
|---|---|
| Using wrong oil grade | Poor performance & damage risk |
| Forgetting new oil filter | Dirty oil cycles back |
| Over-tightening filter or drain plug | Stripped threads, leaks |
| Not checking leaks | Can lose oil and damage engine |
| Overfilling oil | Can cause foaming and pressure issues |
Being careful prevents expensive repairs!
Benefits of Doing Oil Changes Yourself
Doing your own oil change: oil change steps
✔ Saves $40–$100 every time
✔ Helps you learn basic car care
✔ Gives you confidence to fix more things later
✔ Can be done in under 45 minutes
It’s great for families, students, and car lovers in the USA who want to save money and keep their vehicles reliable.
Final Thoughts: Oil Change Steps Made Simple
If you follow these oil change steps:
1 Warm engine
2 Lift car safely
3 Drain old oil
4 Replace filter
5 Install plug
6 Add fresh oil
7 Check for leaks
Your engine will run smoother, last longer, and be more fuel-efficient.
Oil changes are the #1 maintenance task every vehicle needs — and now YOU know how to do it correctly!