
To remove car wrap, begin by heating the vinyl with a heat gun and then slowly peeling it off, being careful not to damage the paint. How to Remove Car Wrap ?v Car wraps can be removed easily by following these steps.
Using heat, such as from a heat gun or hairdryer, will soften the adhesive and make the vinyl easier to remove without leaving residue. Car wrapping has become a popular way to change the look of a vehicle without altering the original paint job.
Whether for personal or commercial use, car wraps offer a versatile and customizable solution. However, there may come a time when the car wrap needs to be removed. This may be due to wear and tear, change of design, or the end of a marketing campaign. Understanding the proper steps to remove car wrap is essential to avoid damaging the vehicle’s paint and ensuring a clean removal. In this guide, we will discuss the best practices for removing car wraps effectively and safely.How to Remove Car Wrap ?
1. Preparing For Car Wrap Removal
1. Preparing for Car Wrap Removal
Before starting the car wrap removal process, proper preparation is essential for a smooth and efficient experience. This phase involves gathering the necessary tools, cleaning the surface, and testing a small area to ensure optimal results.How to Remove Car Wrap ?
1.1 Gather The Necessary Tools
When getting ready to remove a car wrap, it’s crucial to have the right tools at your disposal. Here are the essential tools you’ll need:How to Remove Car Wrap ?
| Tools | Description |
|---|---|
| Heat Gun or Hair Dryer | To help loosen the adhesive and make the vinyl easier to remove. |
| Plastic Razor Blades | To prevent surface damage as they are less sharp than metal blades.How to Remove Car Wrap ? |
| Rubber Squeegee | To aid in pushing out air bubbles and smoothing the wrap during removal. |
| Isopropyl Alcohol | For thorough surface cleaning before vinyl removal. |
1.2 Clean The Surface
Prior to removing the car wrap, it’s essential to clean the surface where the vinyl is attached. Here’s how to do it:
- Begin by washing the car using a mild detergent and water.How to Remove Car Wrap ?
- After the vehicle is clean and dry, use a mixture of isopropyl alcohol and water to further cleanse the surface. Ensure all dirt, wax residue, and other contaminants are thoroughly removed.How to Remove Car Wrap ?
1.3 Test A Small Area
Before commencing with the complete car wrap removal, it’s wise to test a small, inconspicuous area first. This will help ensure the adhesive is not overly aggressive and won’t damage the underlying paint. Use a heat gun or hair dryer to warm the vinyl, then carefully peel back a corner to assess the ease of removal.How to Remove Car Wrap ?
2. Heating And Peeling The Wrap
When it comes to removing a car wrap, the heating and peeling method is one of the most effective techniques. By using heat, you can soften the adhesive of the wrap, making it easier to peel off. Let’s dive into the steps for heating and peeling the wrap.How to Remove Car Wrap ?
2.1 Use A Heat Gun
Using a heat gun is the most efficient way to heat the car wrap. Make sure to set the heat gun to a moderate temperature to avoid damaging the vehicle’s surface. Keep the heat gun at a distance of about 8-12 inches from the wrap, and move it continuously to apply heat evenly.How to Remove Car Wrap ?
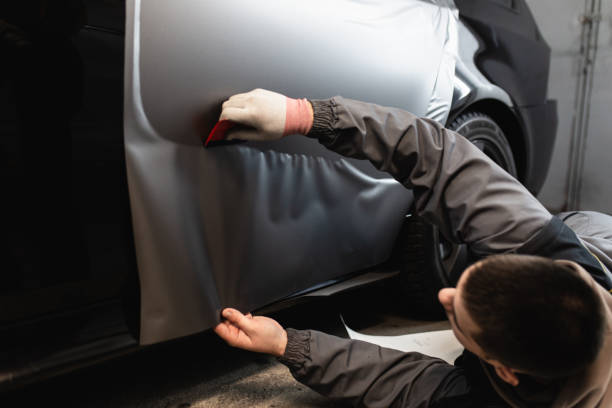
2.2 Start Peeling From An Edge
Starting from an edge of the car wrap, use your fingers to lift the corner gently. Avoid using excessive force to prevent any damage to the paint or underlying surface. Once you have a good grip, slowly pull the wrap at a 45-degree angle.How to Remove Car Wrap ?
2.3 Apply Heat As You Go
As you continue peeling, remember to apply heat to the area you are working on. The heat softens the adhesive, making it easier to peel off without leaving any residue. Work gradually and consistently, heating and peeling in small sections until the entire wrap is removed.How to Remove Car Wrap ?
3. Removing Adhesive Residue
One of the most important steps in removing a car wrap is getting rid of any sticky residue left behind after peeling off the vinyl. This can be a tedious task, but with the right approach, it becomes a smooth process.How to Remove Car Wrap ?
3.1 Use A Solvent Or Remover
The first step is to choose the right solvent or remover to dissolve the adhesive residue. There are various options available in the market, including commercial adhesive removers, rubbing alcohol, or even household items like vinegar or WD-40. Take care to select a solvent that is safe to use on the car’s surface and won’t damage the paint or clear coat.How to Remove Car Wrap ?
3.2 Apply The Solvent And Let It Soak
Once you have selected the appropriate solvent, apply it generously on the adhesive residue and let it soak for a few minutes. The solvent will break down the sticky residue, making it easier to remove. Use a cloth or sponge to apply the solvent evenly and avoid any excess dripping onto other areas of the car.How to Remove Car Wrap ?
3.3 Gently Scrub Or Wipe Off The Residue
After allowing the solvent to work its magic, it’s time to gently scrub or wipe off the adhesive residue. Using a soft cloth or sponge, start scrubbing the area in a circular motion. Apply slight pressure, but be careful not to damage the paint. If the residue is stubborn, you can also use a plastic scraper or your fingernail (covered with a cloth) to gently lift off the adhesive.How to Remove Car Wrap ?
Continue scrubbing or wiping until all the residue is removed. Be patient, as it may take some time to eliminate all traces of stickiness. Remember to check the surface regularly to ensure you are not causing any damage.
Once you have successfully removed all the adhesive residue, make sure to clean the area thoroughly with soap and water. This will help remove any remaining residue and leave the surface clean and ready for any further treatment or application. Take your time during this step to make sure you achieve a clean and flawless finish.How to Remove Car Wrap ?

Credit: accuratesigns.net
4. Cleaning And Preparing The Surface
To remove a car wrap, start by cleaning and preparing the surface. Use a mild soap and water to wash the car thoroughly. Then, remove any adhesive residue with a solvent or heat gun, being careful not to damage the paint.
This step ensures a smooth removal process.
Once you have successfully removed the car wrap, it’s time to clean and prepare the surface for reapplication or any other desired treatment. This step is crucial to ensure a smooth and flawless finish. By following the below steps, you can effectively clean the surface, remove any residue, and eliminate contaminants using a clay bar.How to Remove Car Wrap ?
4.1 Wash The Surface
Before you start any further treatments, thoroughly wash the surface to remove any dirt, debris, or grime. Use a gentle car wash soap and a microfiber sponge to avoid any scratches or damage to the paint. Ensure that the entire surface is cleaned, including the nooks and crevices.How to Remove Car Wrap ?
4.2 Remove Any Remaining Residue
After washing, there might still be some adhesive residue left on the surface. To remove it, you can use a residue remover, which is specially formulated for automotive surfaces. Apply the residue remover to a clean cloth and gently rub it over the affected areas. Be sure to follow the instructions provided by the manufacturer and test it on a small, inconspicuous area first.How to Remove Car Wrap ?
4.3 Use A Clay Bar To Remove Contaminants
To achieve a truly clean and smooth surface, employing a clay bar is highly recommended. A clay bar is designed to remove contaminants such as tree sap, road tar, and industrial fallout that are not easily removed by traditional cleaning methods. Break off a small piece of the clay bar and flatten it into a disc. Then, lubricate the surface with a clay lubricant or a mix of water and car wash soap. Gently glide the clay bar across the surface using light pressure, moving it in a back-and-forth motion. Remember to frequently check the clay bar for any accumulated debris and reshape it as needed. Once finished, wipe off any remaining residue with a microfiber cloth.How to Remove Car Wrap ?
Cleaning and preparing the surface is a vital step in the car wrap removal process. By following these steps, you ensure that the surface is free from dirt, residue, and contaminants, providing a clean foundation for reapplication or other treatments. Ready for the next step? Let’s move on to the next section: 5. Evaluating the Condition of the Paint.How to Remove Car Wrap ?
5. Applying A New Car Wrap
Once you’ve successfully removed the old car wrap, it’s time to give your vehicle a fresh new look by applying a new wrap. This process might sound daunting, but with the right approach, you can achieve professional-looking results. In this section, we’ll guide you through the steps to choose and purchase the wrap, prep the surface, and apply the new wrap effectively.
5.1 Choose And Purchase The Wrap
Before diving into the application process, you need to choose a suitable car wrap that matches your style and preferences. Here are the key steps to making an informed decision:
- Consider the type of wrap: There are various options available such as vinyl, chrome, matte, and glossy wraps. Determine the look you want to achieve and select the appropriate material.
- Measure your vehicle: Accurate measurements are crucial to ensure you purchase the correct amount of wrap. Measure the length, width, and height of different sections of your car.
- Research reputable suppliers: Look for trusted suppliers who offer high-quality wraps and favorable reviews from previous customers.
- Compare prices: As with any purchase, it’s advisable to compare prices from different suppliers to find the best deal without compromising on quality.
- Make the purchase: Once you’ve found the perfect wrap, complete your purchase, and wait excitedly for it to arrive.
5.2 Prep The Surface
Properly prepping the surface of your vehicle is essential to ensure the new car wrap adheres well and doesn’t peel off prematurely. Follow these steps:
- Wash your car: Thoroughly clean the car using car soap, making sure to remove any dirt, grime, or debris that might interfere with the adhesion of the wrap.
- Dry the surface: Allow the car to air dry or use a clean microfiber towel to dry it completely. Moisture can affect the wrap’s ability to adhere properly.
- Eliminate residual adhesive: If there are any remnants of the previous car wrap’s adhesive, use an adhesive remover and a clean cloth to gently remove them. Ensure the surface is smooth and free from any sticky residue.
- Sand uneven areas: If you notice any rough or uneven sections on the surface of the car, lightly sand them down to create a smooth and even base.
- Remove hardware and trim: To enhance the wrap’s appearance and ensure a clean application, consider removing any hardware, handles, or trim pieces that can be easily detached.
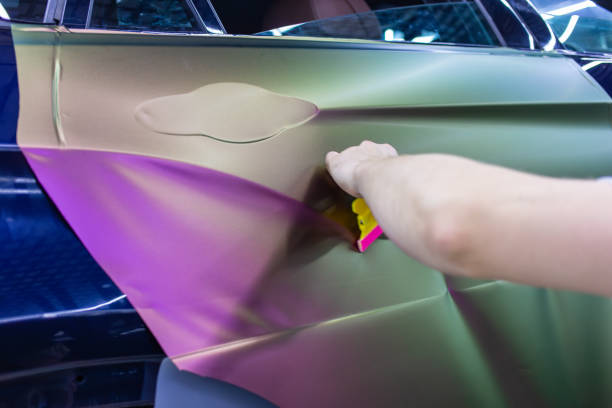
5.3 Apply The New Wrap
Now, let’s apply the new car wrap to give your vehicle a stunning transformation:
- Gather your tools: To ensure a seamless application, gather the necessary tools including a squeegee, heat gun or blow dryer, razor blade, microfiber cloth, and a cutting tool.
- Line up the wrap: Carefully unroll the wrap and line it up, ensuring it covers the entire desired area. Use tape to temporarily hold it in place if needed.
- Start from the middle: Begin by applying the wrap from the center outward, using a squeegee to smooth out any air bubbles or wrinkles as you go. Work in small sections for better control.
- Use heat for flexibility: If the wrap needs to conform to curves or contoured areas, gently heat it with a heat gun or blow dryer to make it more pliable.
- Cut off excess wrap: Once you’ve covered the entire surface, use a razor blade or cutting tool to carefully trim away any excess wrap, ensuring clean and precise edges.
- Final touches: To achieve a professional finish, squeegee the entire wrap once again, paying attention to edges and corners. Use the heat gun or blow dryer to activate the adhesive and help the wrap adhere firmly.
Congratulations! You’ve successfully applied a new car wrap to your vehicle, giving it an eye-catching and stylish appearance. With proper maintenance and care, your wrap will last for years to come.
6. Professional Car Wrap Removal
When it comes to removing a car wrap, sometimes it’s best to leave it to the professionals. A professional car wrap removal service has the expertise and tools to effectively and safely remove the wrap without causing damage to your vehicle’s paintwork. Here are a few reasons why you should consider hiring a professional:How to Remove Car Wrap ?
6.1 Consider Hiring A Professional
Hiring a professional for car wrap removal ensures that the job is done correctly. Professionals have the necessary knowledge and experience to handle the process efficiently, minimizing the risk of any mistakes or mishaps. They understand the various techniques and products required to remove the wrap without leaving any residue or damaging the underlying paint.How to Remove Car Wrap ?
6.2 Get Quotes From Different Experts
Before hiring a professional car wrap removal service, it’s essential to get quotes from different experts. Comparing quotes allows you to find the most cost-effective option that suits your budget. Reach out to multiple professionals and provide them with details about your vehicle, the type of wrap, and any other specific requirements. This way, you can obtain accurate quotes and make an informed decision.How to Remove Car Wrap ?
6.3 Schedule An Appointment
Once you have received quotes from several experts, it’s time to schedule an appointment. Contact the professional you have chosen and arrange a suitable date and time for the car wrap removal. Ensure that you ask about any preparation or requirements before the appointment, such as removing personal belongings from the vehicle or cleaning it beforehand.How to Remove Car Wrap ?
Scheduling an appointment in advance guarantees that you have dedicated time for the removal process. The professional can allocate enough time to complete the job efficiently and to the highest standard possible.How to Remove Car Wrap ?
By following these steps, you can enjoy a hassle-free car wrap removal experience with the help of a professional. Remember to consider their expertise, compare quotes, and schedule an appointment to ensure a smooth and successful removal process.How to Remove Car Wrap ?
7. Tips And Precautions
When removing a car wrap, it’s crucial to follow certain tips and precautions to ensure a smooth and safe process. Here are 7 essential tips and precautions to keep in mind before getting started.
7.1 Work In A Well-ventilated Area
Before starting the car wrap removal process, it’s important to work in a well-ventilated area to avoid inhaling any potentially harmful fumes that may be released during the removal process. A well-ventilated space will also help in maintaining a comfortable working environment.
7.2 Be Patient And Take Your Time
Removing a car wrap can be a time-consuming task, so it’s important to be patient and take your time to ensure that it is done correctly. Rushing the process can lead to mistakes and potential damage to the underlying paint of the car.
7.3 Protect The Car’s Paint
When removing the car wrap, it’s crucial to take measures to protect the car’s paint. Using a heat gun at an appropriate distance can help in loosening the adhesive without damaging the paint. Additionally, using a plastic razor blade or a soft cloth can further protect the paint during the removal process.
Frequently Asked Questions Of How To Remove Car Wrap
How Do You Remove Car Wrap Without Damaging The Paint?
To remove car wrap without damaging the paint, start by heating the wrap with a heat gun or blow dryer. Then, slowly peel off the wrap using a plastic scraper. Use adhesive remover to eliminate any residue. Finally, clean the surface with soapy water and a microfiber cloth.
Can I Remove Car Wrap Myself Or Should I Hire A Professional?
You can remove car wrap yourself if you have the necessary tools and experience. However, hiring a professional is recommended for a seamless and efficient removal process. Professionals have the expertise to prevent damage to the paint and ensure a smooth and clean removal.
What Tools Do I Need To Remove Car Wrap?
To remove car wrap, you will need a heat gun or blow dryer, a plastic scraper or squeegee, adhesive remover, and soapy water with a microfiber cloth. These tools will help you heat, peel, clean, and remove any remaining adhesive effectively.
It’s important to use the right tools to avoid damaging the paint.
Conclusion
To summarize, removing a car wrap can be a straightforward process if you follow the proper steps and use the right tools. By preparing the surface, using heat for easy removal, and employing a gentle touch, you can successfully take off the car wrap without damaging the underlying paint.
Remember to be patient and take your time to ensure a smooth and seamless removal. With these tips in mind, you can confidently remove your car wrap and give your vehicle a fresh new look.